Start regedit, if you are unfamiliar with regedit please see our FAQ.
Navigate to HKEY_LOCAL_MACHINE\SOFTWARE\Microsoft\Windows NT\CurrentVersion\Winlogon
Modify the key legalnoticecaption with what you want to name the window.
Modify the key legalnoticetext with what you want the window to say. Restart
LinkWithin
Saturday
DISPLAY MESSAGE ON STARTUP.
SPEED UP MENU DISPLAY.!!
When using the start menu the you will notice a delay between different tiers of the menu hierarchy. For the fastest computer experience possible I recommend changing this value to zero. This will allow the different tiers to appear instantly.
Start Regedit. If you are unfamiliar with regedit please refer to our FAQ on how to get started.
Navigate to HKEY_CURRENT_USER\Control Panel\Desktop
Select MenuShowDelay from the list on the right.
Right on it and select Modify.
Change the value to 0.
Reboot your computer.
Notepad Trick
Well quite old but here is d complete collection
Step 1: Open Notepad
Step 2: Write following line in the notepad.
this app can break
Step 3: Save this file as xxx.txt
Step 4: Close the notepad.
Step 5: Open the file again.
Voilla!!
Tuesday
How to make your Desktop Icons Transparent
Go to Control Panel > System, > Advanced > Performance area > Settings button Visual Effects tab "Use drop shadows for icon labels on the Desktop"
Friday
Botanical Garden & Maison - Links to request the building materials you need
FarmVille has ended the Botanical Garden and Maison building. There is no way to send the building materials to your friends. However, FarmVille has NOT YET removed the ability to request the building materials. I've tested these links and they are, as of May 16, 2010, working. So if you need to finish your Botanical Garden or Maison houses, use the links below to request the materials from your friends. But do it quickly. There is no way of knowing how long it will take FarmVille to dismantle these links.
Botanical Garden
Floral Bracket - Glass Sheet - Green Beam - Irrigation Pipe - White Trellis
Maison
Aged Brick - Clinging Vine - Paned Window - Slate Tile - Weathered Board
NOTE: - When your friends respond to these requests, the building materials will go straight to your Giftbox. As such, you MUST make sure you have plenty of room in your Giftbox to receive them. Otherwise, you risk losing the materials.
Wednesday
AUTO DELETE TEMPORARY FOLDER.!!
ll what i prefer is %temp% " without quotes.. at Start -> Run..
this opens ur temp folder n den u cal erase it neatly// still try dis one too..
First go into gpedit.msc
Next select -> Computer Configuration/Administrative Templates/Windows Components/Terminal Services/Temporary Folder
Then right click "Do Not Delete Temp Folder Upon Exit"
Go to properties and hit disable. Now next time Windows puts a temp file in that folder it will automatically delete it when its done! Note from Forum Admin: Remember, GPEDIT (Group Policy Editor) is only available in XP Pro.
Saturday
UpsideDownTex
About UpsideDownText.com
Is your sex text-life getting boring? Tired of Times New Roman and Arial?
Well, **** them. Introducing UpsideDownText.com - the text converter, that takes boring ol' letters, and flips them 180 degrees. Whether it be just a word, symbol, or even an essay, we can take what you got, and make it 100x cooler. So WOW your girlfriend, or annoy your teacher, using the fast, simple, free, and totally awesome UpsideDownText.com.
Now the facts: I'll be the first to admit - sites like this are rarely taken seriously. Most such sites are designed by amateur coders, using FrontPage, loads of Google Ads, and a guess-and-check approach to programming. The result is what you'd expect - a website that is functional, but annoying and frustrating to use. It's true, reversing text, or flipping it upside down, is not a complicated task. But it's important that even the simple things be done right. And so in 2009, fed up with the lack of quality resources, I developed UpsideDownText.com. UpsideDownText is committed to doing this service right by providing a clean interface free from ridiculous amount of advertisements, and to giving our users a converter that is flexible and easy to use. In fact, we have designed one of the most polished generators available, and one of the few that can be customized to only return upside down text, or only reverse the text, or even return Unicode escaped HTML.
We sincerley hope that you enjoy using this service. If used properly, it can really spice up your Facebook, Twitter, or MySpace pages (or even an e-mail, postcard, or word document). And if you can somehow impress your girlfriend with a simple things like this... well, kudos to you. But please, do not turn in an upside down essay to your teacher...
Have a wonderful day, week, month, year, and life =)
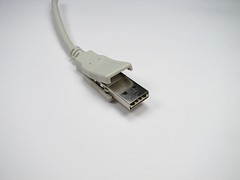
Hide the USB Drive inside a USB Cable
It's no secret that there are a lot of strange USB devices out there, particularly flashdrives. Not a comprehensive list, but we've sure seen Lego, twigs, action figures, bowling balls, sushi, anatomical parts, transparent drives, erasers, cassette tapesand on and on and on.
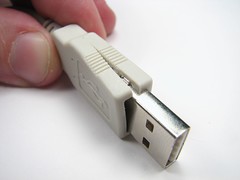
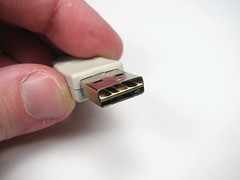
Despite all that, the picture above is a little surprising-- because yes, it's a working USB flash drive. Here, we give the step by step walk through of how to make your own.
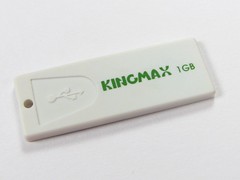

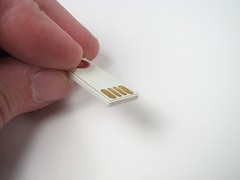
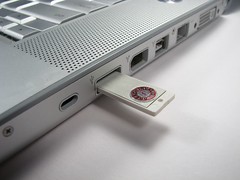
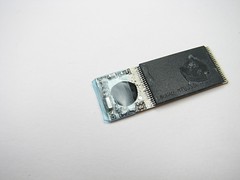
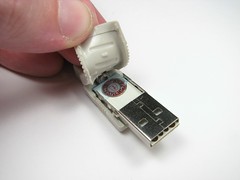
This is a KingMax 1 GB USB flash drive, one of the smaller varieties out there. I got it on eBay for about $10 and there seem to be plenty more available. Above, you can see it in between my fingers and in my computer for scale. The gold pads are just printed pads on a tiny circuit board.
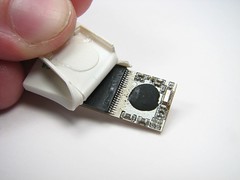
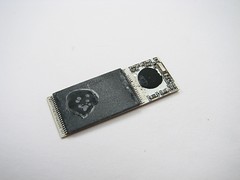
The plastic cover is attached only weakly, by a bit of silicone adhesive, and peels off fairly easily to expose the bare printed circuit board of the flash drive. Not too much to it, really.
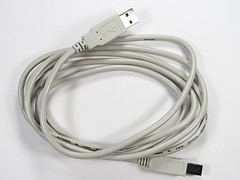
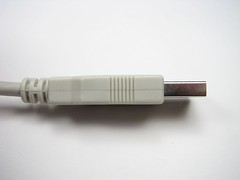
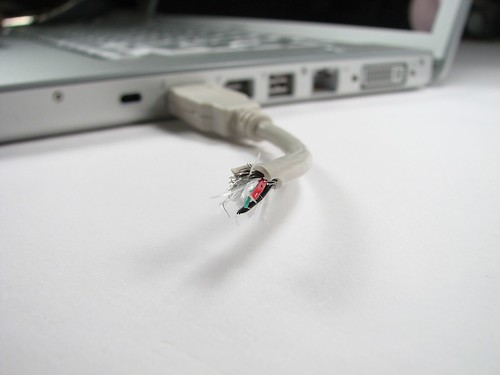
Next we need a victim USB cable. I started with this new $1.50 USB "A-B" cable. Looking at the end that we'll be cutting up, you might notice a neat injection molding seam that runs around the edge. Using a sharp hobby knife, cut neatly along that seam. Cutting there actually provides some camouflage for you: Since we expect there to be a seam there, it's very hard to notice an additional cut as well. If you really want your seams to be invisible, you might want to use a black USB cable. Cut deeply enough that you actually cut through to the metal shell underneath the rubber, at which point you can start to peel back the rubber parts.
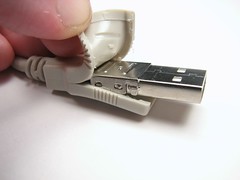


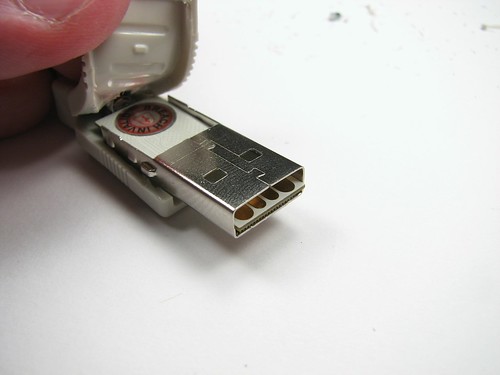
The metal shell underneath the rubber overmolding consists of two of pieces of thin steel that are stamped and folded into place. They are held together by some tabs and slots-- use a small screwdriver to defeat the tabs and you can pull the flap the "lid" piece, so that you can now get at the inside of the metal shell.
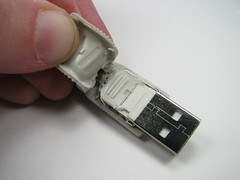

With the one piece of the metal shell removed, you have access to the middle parts of the shell where the original USB wires and plastic and metal connections are located. Cut them away with your choice of tools. I found that the hobby knife worked well enough to sever the wires, at which point the remaining plastic parts could be removed pretty easily. What's left is just the metal shell-- ready for us to put our own circuit board in.
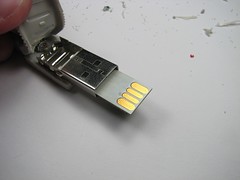
Now we can start to test-fit the bare-board USB drive into the metal shell. Seems to fit okay. Still need to fix it in place, though.
One other final detail to take care of: The back side, where the circuit board will be resting, has some metal parts that the back side of the circuit board will be touching-- so we need an insulator there. I had an old piece of clear blue heat-shrink tubing that happened to fit well, but a piece of electrical tape would have done the job too. Once that was added, it all looked safe and still fit together.
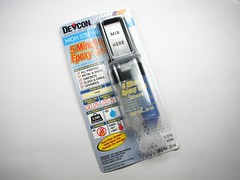
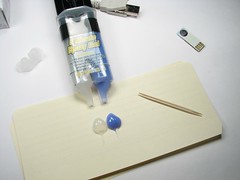

To bond everything together and fill all the extra space inside the USB cable end, I use gel-style 5 minute epoxy. Fortunately, five minutes gives you enough time to apply the glue, place the flash drive in place, and put the rubber molded housing back on. Hold the connector firmly-- paying attention to the seams for alignment-- until the epoxy cures, about five more minutes.
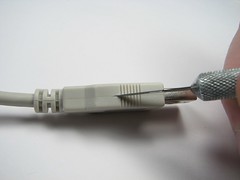
Last step: Cut the cable as desired. A jagged cut looks different than a clean cut-- take your pick.
mate rani chinnadani
మాటే రాని చిన్నదాని కళ్ళు పలికే ఊసులు
అందాలన్ని పల్లవించి ఆలపించే పాటలు
ప్రేమే నాకు పంచె జ్ఞాపకాలురా
రేగే మూగ తలపె వలపు పంట రా
... See more
మాటే రాని
వెన్నెలల్లె పూలు విరిసి తేనెలు చిలికెను
చెంత చేరి ఆదమరచి ప్రేమలు కొసరెను
చందనాల జల్లు కురిసె చూపులు కలిసెను
చందమామ పట్ట పగలె నింగిన పొడిచెను
కన్నె పిల్ల కలలే నాకిక లోకం
సన్నజాజి కలలే మోహన రాగం
చిలకల పలుకులు అలకల ఉలుకులు
నా చెలి సొగసులు నన్నే మరిపించే
మాటే రాని
ముద్దబంతి లేత నవ్వులు చిందెను మధువులు
ఊసులాడు మేని వగలు వన్నెల జిలుగులు
హరివిల్లులోని రంగులు నా చెలి సొగసులు
వేకువల మేలుకొలుపె నా చెలి పిలుపులు
సందె వేళ పలికే నా లో పల్లవి
సంతసాల సిరులే నావే అన్నవి
ముసి ముసి తలపులు తరగని వలుపులు
నా చెలి సొగసులు అన్నీ ఇక నావే
Friday
FarmVille Biplane

A new vehicle has debuted in FarmVille tonight, a Biplane that will immediately apply Instant Grow to all of your planted seeds, allowing you to instantly harvest them. This new Biplane is available under the vehicles tab of the Market, and we have all the details for you.
The Biplane costs 30,000 coins in order to purchase, and after you own it you can place it anywhere it will fit on your farm. Similar to the Tractor and other vehicles, placing the plane does not activate it - you still have to click on it to activate the instant growing ability that it provides. Once you place the plane, you'll be prompted to share your accomplishment with your friends on your Facebook wall.
Wednesday
NOTEPAD "world trade centre trick"
Did you know that the flight number of the plane that had hit WTC ...on
9/11 was Q33N ....Open your Notepad in ur computer and type the flight
number i.e Q33N... Increase the Font Size to 72, Change the Font to
Wingdings. U will be amazed by the findings
Tuesday
Remove Stored username and Passwords
To remove the Stored User Names and Passwords from your system, try this:
Click Start, Run and type Control keymgr.dll
Remove the entries from the list.
The other ways to access this dialog are:
Type Control Userpasswords2 in RUN box, click Advanced, Manage Passwords
-or-
From Control Panel, select your User Account, click Manage your network passwords
Subscribe to:
Posts (Atom)